Congratulations on learning (or relearning) how to read music! This Self-Learning Music Curriculum will guide you step-by-step from sounding your first notes to where you can play from just about any book of popular songs, folk songs, hymns, etc. Along the way, you’ll learn many new skills that will unlock a whole world of musical possibilities.
This first lesson provides a foundation for all the lessons that follow, so take your time.
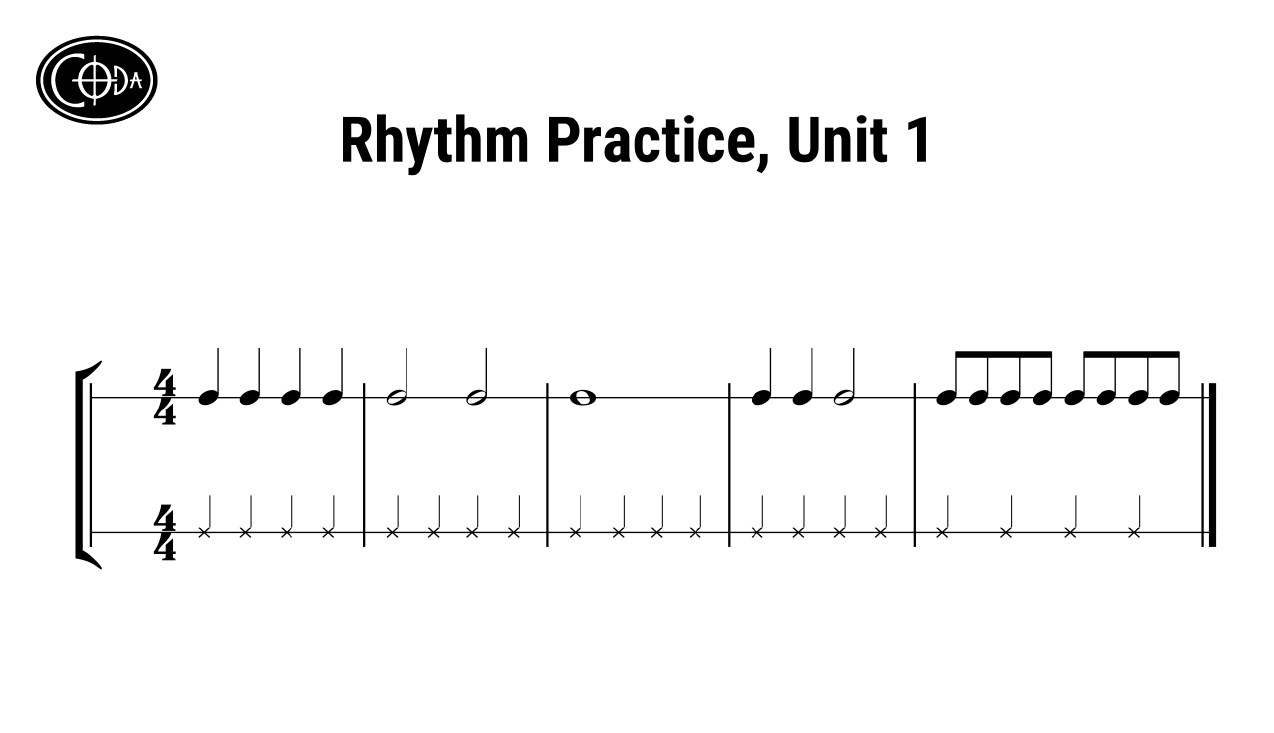
Before you read and play new rhythms, first you want to be able to feel them. For that reason, please repeat each of the following three steps several times.
1st, LOOK & LISTEN:
Listen to the audio called Rhythm Practice with the B Note while looking at Rhythm Practice, Unit 1.
2nd, look, listen + CLAP:
When ready, begin clapping your hands –or tapping your foot– along with the beat (the sound of the woodblock).
3rd, look, listen, clap + CHANT:
Finally, chant along with the sound of the organ, using the neutral syllable “Too, Too, Too, Too.”
After you can confidently chant along with the audio, move on to Exercise 2.
Look again at Rhythm Practice, Unit 1
You’ll notice that…
…this note lasts one beat: ![]() It is called a quarter note.
It is called a quarter note.
…this note lasts two beats: ![]() It is called a half note.
It is called a half note.
…this note lasts four beats: ![]() It is called a whole note.
It is called a whole note.
…this note lasts ½ a beat: ![]() It is called an eighth note.
It is called an eighth note.
(Repeated eighth notes are usually connected, like this: ♫)
Visualize what these notes look like!
Starting with the whole note, notice how each added feature below cuts the duration of a note in half.
Whole note Looks like a simple hole: ![]() Lasts 4 beats
Lasts 4 beats
Half note Add a stick to the hole: ![]() Lasts 2 beats
Lasts 2 beats
Quarter note Fill in the hole: ![]() Lasts 1 beat
Lasts 1 beat
Eighth note Add a flag: ![]() Lasts ½ a beat
Lasts ½ a beat
(Again, the flags on side-by-side eighth notes are often hooked together: ♫)
Now you’ll make four flashcards:
Fold a piece of paper in half two times –first vertically and then horizontally– to make four equal rectangles. Cut or tear along the folds to make four pieces of paper, which you’ll use to make the following four flashcards.
- whole note
- half note
- quarter note
- eighth note.
Draw one of the four notes on one side of each card. On the other side, write what kind of note it is and how long it lasts.
For example, draw a large whole note on one side of a card. On the other side, write, “whole note; lasts 4 beats.”
You can use these flashcards anytime for a super quick review. Quiz yourself with the flashcards now.
At last, it’s time to play your Coda. (Yay!)
1st, say these syllables out loud: “Too, Too, Too.”
2nd, say “Too, Too, Too” again, but this time use only your airstream. (In other words, whisper “Too, Too, Too,” without using your vocal cords.)
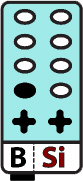
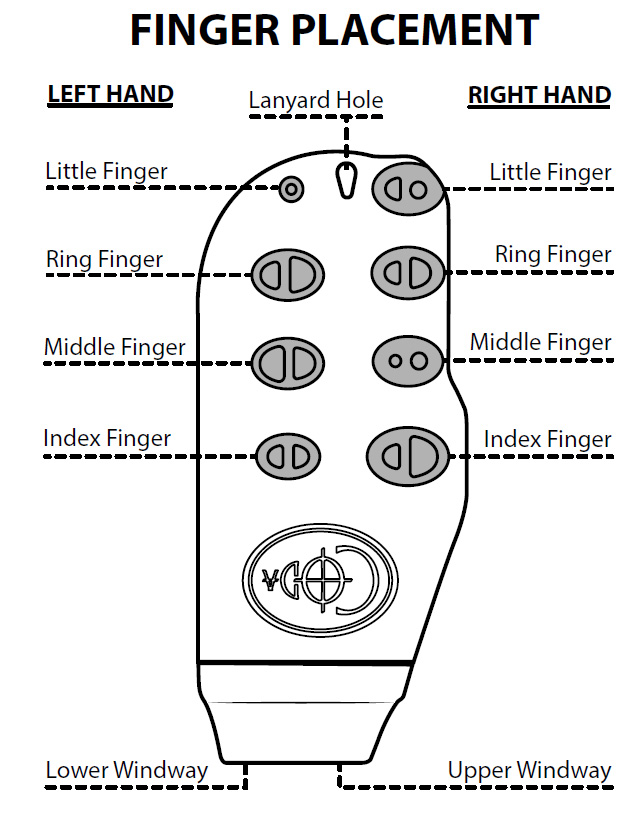
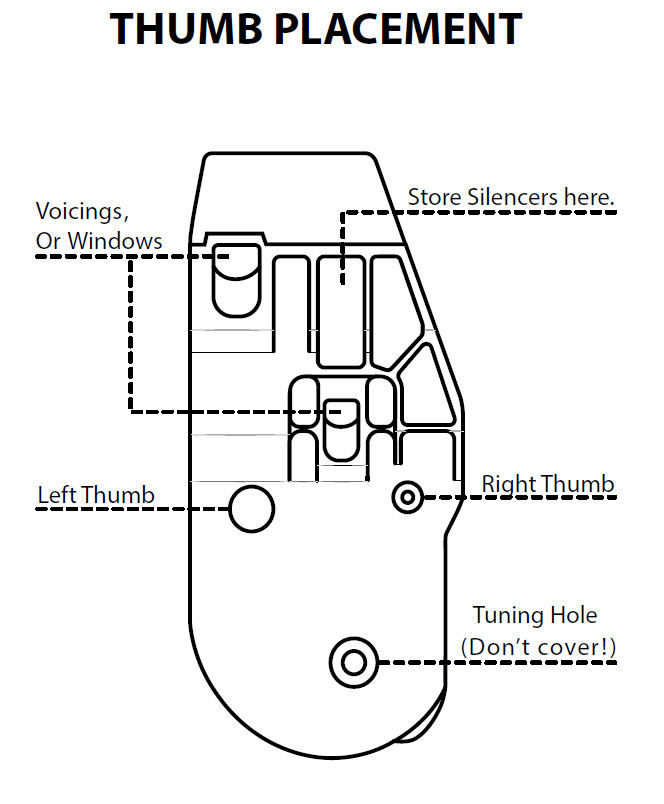
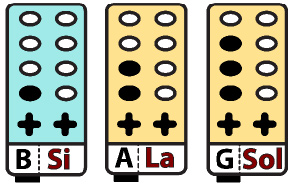
3rd, play the B note several times on Coda. As shown in the diagrams below, cover the two thumb holes and the left index finger tone hole. (Note: + = thumb hole in the blue diagram.) Then, put Coda up to your mouth, and blow into the left windway to sound the B note. To start your airstream for each note, whisper the word “Too” again. (*This is called “tonguing.” Find out more at the end of this exercise.)
Important: Notice that the fingering diagram for B is colored BLUE, whereas A and G are yellow. Blue indicates that this note can be played either on Coda’s upper chamber or on its lower chamber. (For now, just stick to the lower chamber.)
4th, playing only the B note, play along with the audio called Rhythm Practice with the B Note as you read the music notation in Rhythm Practice, Unit 1.
(You’ll notice that you can raise or lower your pitch a bit to match the sound of the audio by blowing softer or harder.)
5th, repeat the 4th step with the notes A and G and their corresponding audios.
6th, slowly play the following sequences of notes to master the fingerings for B, A, and G (which spells the word “BAG.”)
- B A G
- G A B
- A B G
- A G B
- G A B A
- G B A G
- B A G A B
Now, slowly play the song Hot Cross Buns using the following sequence:
B A G
B A G
G G G G
A A A A
B A G
Optional: Try making up your own songs using just the notes B, A, and G.
* On wind instruments, tonguing (i.e., “Too, Too, Too”) is a way to cleanly start notes and to separate notes from one another. You can also tongue notes in a smoother, more subtle manner by whispering the syllable “DooDooDoo” to start and separate notes. And you can start AND stop notes cleanly by whispering “Toot.” You’ll learn other techniques for starting and separating notes later in this curriculum.
For the sake of simplicity, we’ll call notes only by their letter names (B, A, G, etc.) in this curriculum. Hence, you can ignore the red names on the fingering diagrams (Si, La, Sol, etc.), which are used in many non-English-speaking countries.
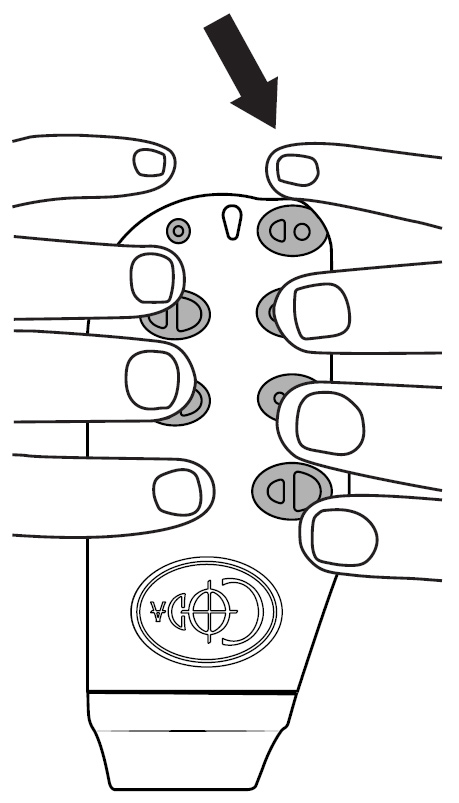
Tip: When you uncover most of the tone holes to play higher notes, you’ll need a way to balance Coda. For now, when you play the B note, try supporting the end of Coda with your right little (pinky) finger as pictured. This takes practice at first, but eventually it will become automatic.
Test your knowledge:
(Why? Because the more deeply you process new information, the better you remember it.)
Why is the fingering diagram for the B note colored blue?
(You can find the answer in Unit 1, Rhythm Practice, Exercise 3.)
Draw a whole note. Write how long it lasts.
(If you have nothing to write with, at least picture these in your mind.)
Draw a half note. How long does it last?
Draw a quarter note. How long does it last?
Draw an eighth note. How long does it last?
Play the following sequence of notes on your Coda. Then silently finger the notes but without blowing.
B A G A
B A G A
B A G A G
Finally, don’t forget to review your new flashcards from time to time.
The next song in Unit 1 is Hot Cross Buns.